码丁实验室,一站式儿童编程学习产品,寻地方代理合作共赢,微信联系:leon121393608。
MicroPython – MQTT 与 ESP32/ESP8266
在这个教程中,将会学习如何使用MQTT在ESP8266与MQTT 服务器之间进行数据交换。最为一个简单的例子,我将使用一个ESP32开发板向MQTT服
务器发送消息,同时从MQTT服务器订阅一个消息。
发布消息的主题(topic)为hello,定于的主题为notification。
我在这里使用的MQTT服务器为mosquitto,在我的Windows10系统的电脑上安装了虚拟机,虚拟机安装Ubuntu系统,在Ubuntu系统里安装的mosquitto。当然也可以安装在树莓派上。
准备工作:
首先需要为ESP32安装micropython固件,MQTT服务器已经设置好,我这里MQTT服务器已经安装完成,IP地址为192.168.1.121,同时设置了连接MQTT服务器的账号与密码,账号为miss,密码为123456。
准备ESP32:
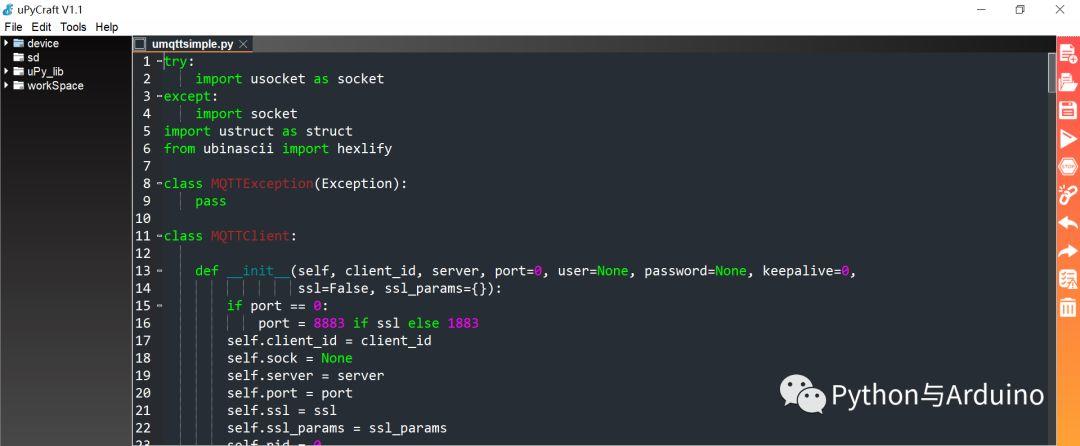
导入umqtttsimple 库,库下载地址:https://raw.githubusercontent.com/RuiSantosdotme/ESP-MicroPython/master/code/MQTT/umqttsimple.py
复制代码,在uPyCraft中新建一个文件,粘贴,保存为umqttsimple.py文件
准备boot.py
导入必要的库:
import time
from umqttsimple import MQTTClient
import ubinascii
import machine
import micropython
import network
import esp
设置debug为None,激活垃圾收集器。
esp.osdebug(None)
import gc
gc.collect()
定义一些必要的变量,包括本地WiFi账号与密码,mqtt服务器IP地址,MQTT用户名与密码,mqtt客户端id,发布与订阅的主题,接收消息的时间间隔等。
ssid = ‘your-ssid’
password = ‘your-pwd’
mqtt_server = ’192.168.1.121′
mqtt_user=’miss’
mqtt_pwd=’123456′
client_id = ubinascii.hexlify(machine.unique_id())
topic_sub = b’notification’
topic_pub = b’hello’
last_message = 0
message_interval = 5
counter = 0
将ESP32连接到网络:
station = network.WLAN(network.STA_IF)
station.active(True)
station.connect(ssid, password)
while station.isconnected() == False:
pass
print(‘Connection successful’)
print(station.ifconfig())
准备main.py
定义一个订阅回调函数:
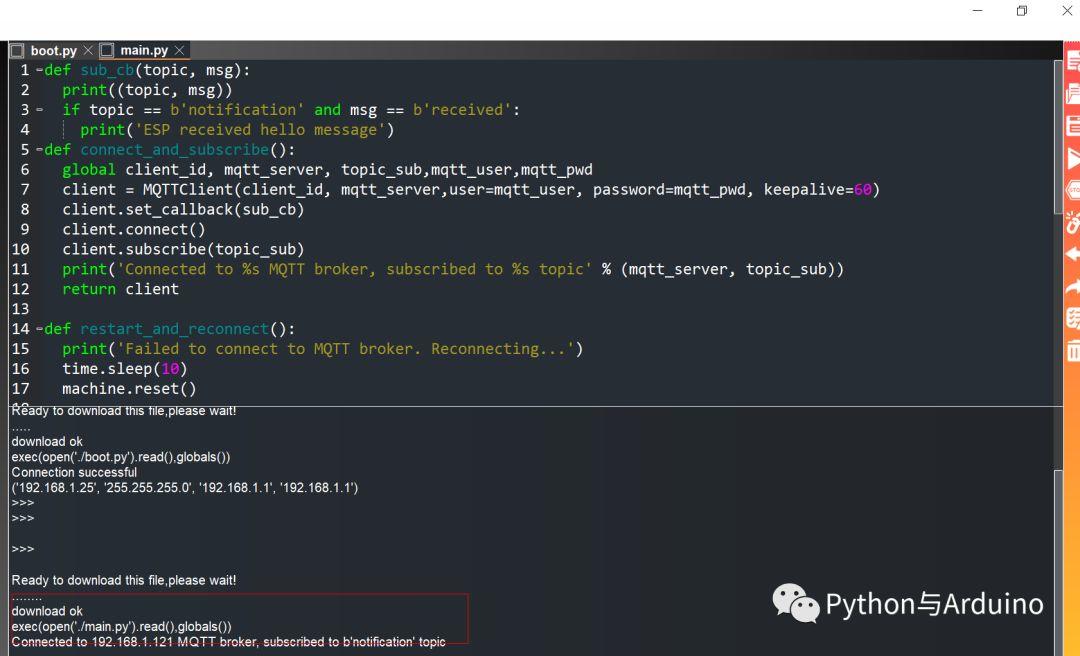
def sub_cb(topic, msg):
print((topic, msg))
if topic == b’notification’ and msg == b’received’:
print(‘ESP received hello message’)
定义一个连接MQTT服务器和订阅主题的函数:
def connect_and_subscribe():
global client_id, mqtt_server, topic_sub,mqtt_user,mqtt_pwd
client = MQTTClient(client_id, mqtt_server,user=mqtt_user, password=mqtt_pwd, keepalive=60)
client.set_callback(sub_cb)
client.connect()
client.subscribe(topic_sub)
print(‘Connected to %s MQTT broker, subscribed to %s topic’ % (mqtt_server, topic_sub))
return client
定义一个重启和重新连接的函数:
def restart_and_reconnect():
print(‘Failed to connect to MQTT broker. Reconnecting…’)
time.sleep(10)
machine.reset()
开始使用上面定义的函数连接MQTT服务器,订阅notification主题,并向hello主题发布消息:
try:
client = connect_and_subscribe()
except OSError as e:
restart_and_reconnect()
while True:
try:
client.check_msg()
if (time.time() – last_message) > message_interval:
msg = b’Hello #%d’ % counter
client.publish(topic_pub, msg)
last_message = time.time()
counter += 1
except OSError as e:
restart_and_reconnect()
完整boot.py与main.py代码可以查看下面的腾讯文档链接
https://docs.qq.com/doc/DS1pqd25qSUdIQ3dN
运行程序与效果图:
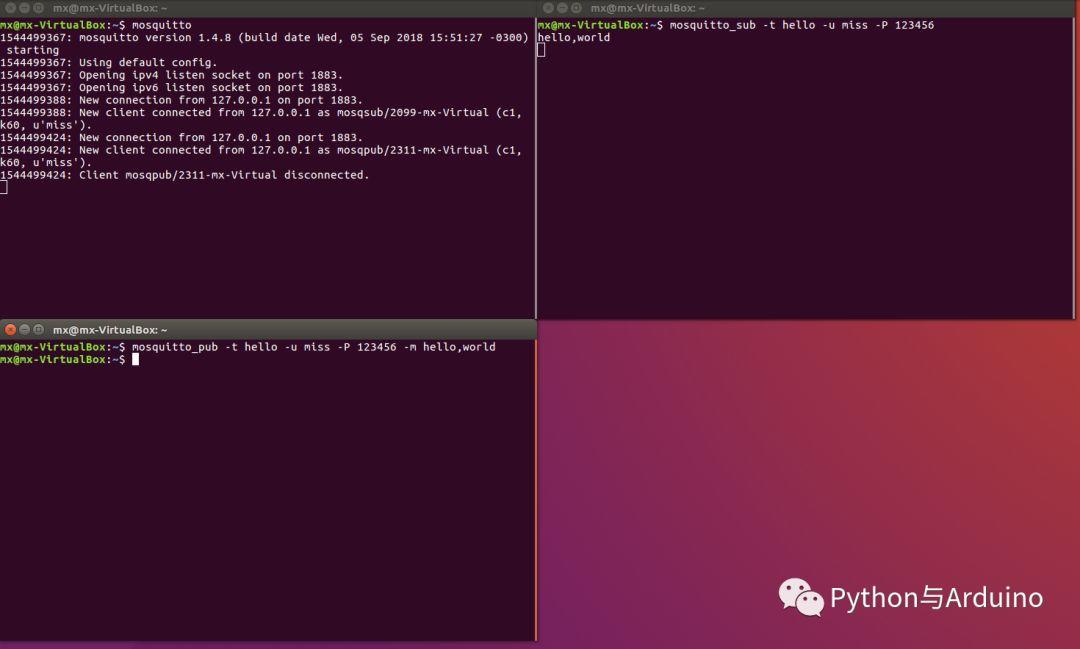
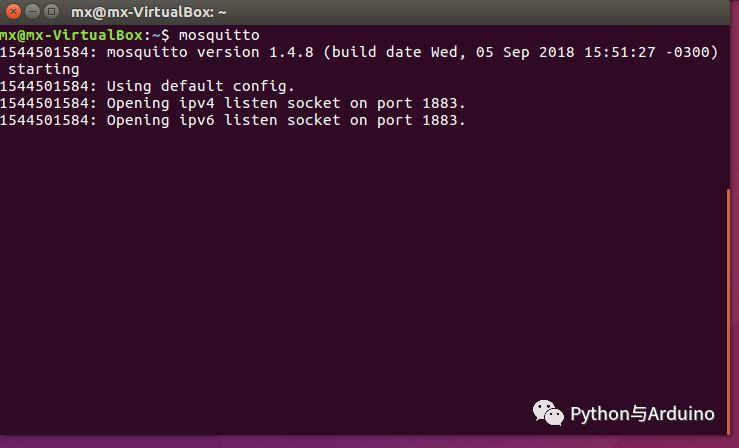
- 启动虚拟机上的mqtt服务器
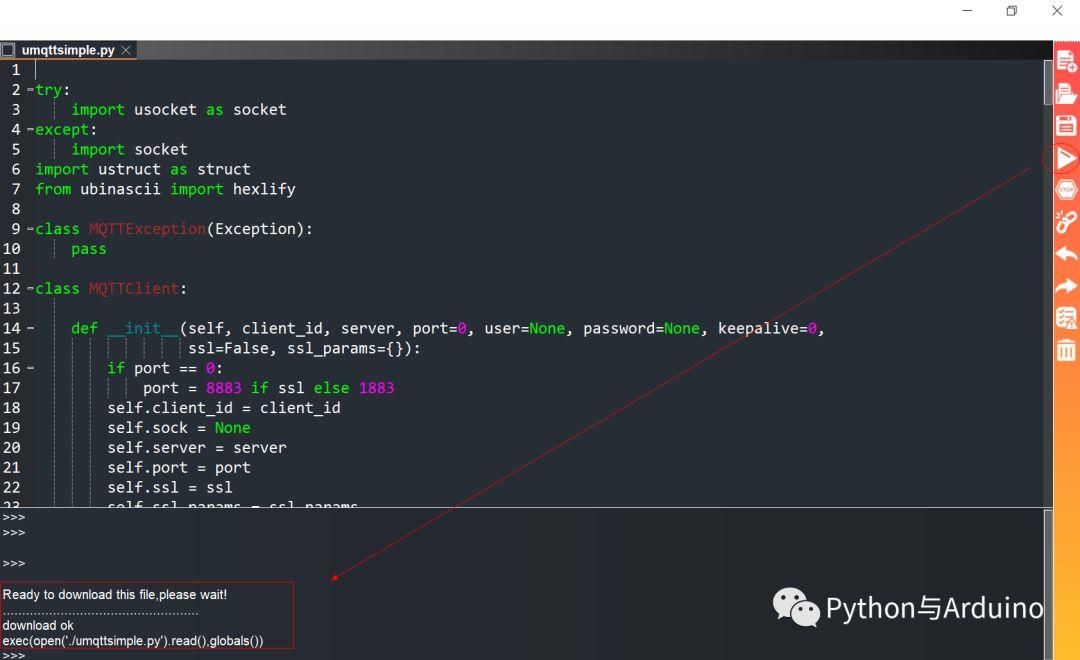
2.上传umqttsimple.py
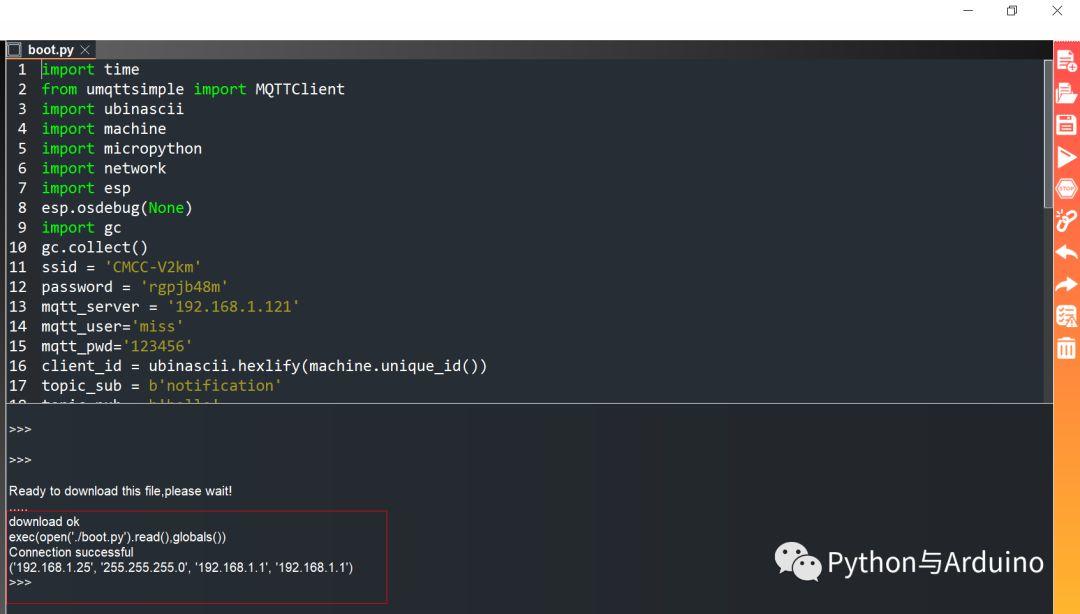
3.上传boot.py
4.上传main.py
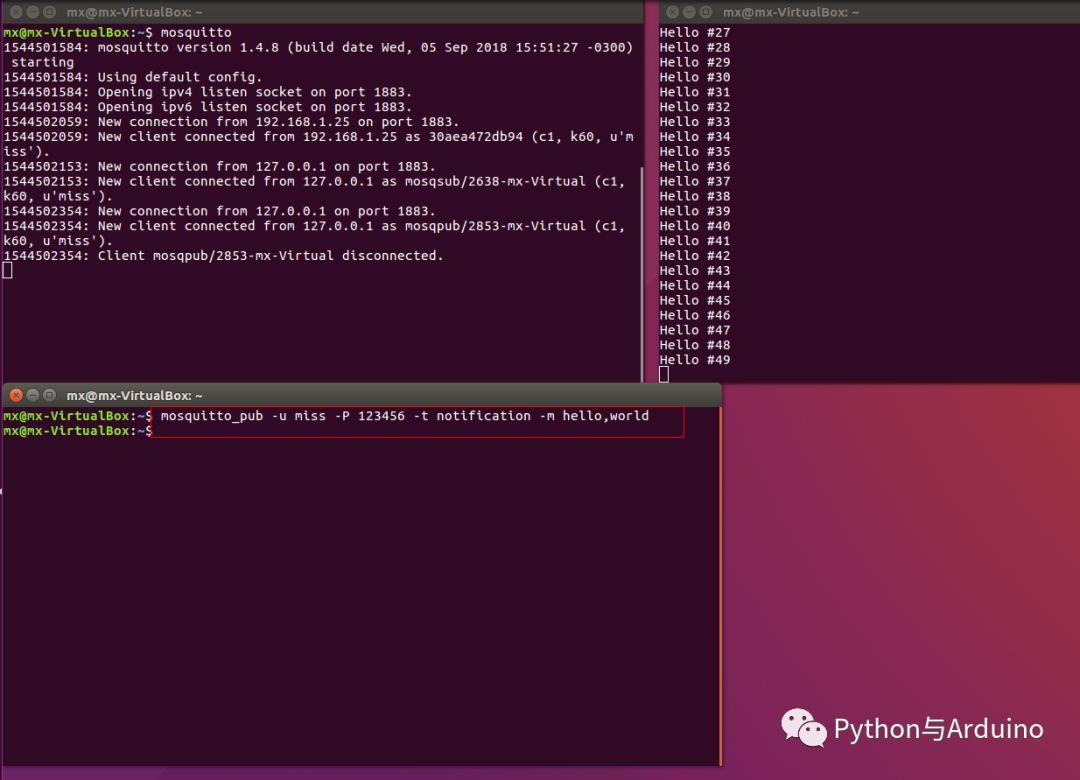
5.使用mosquitto_sbu命令订阅ESP32发送的消息

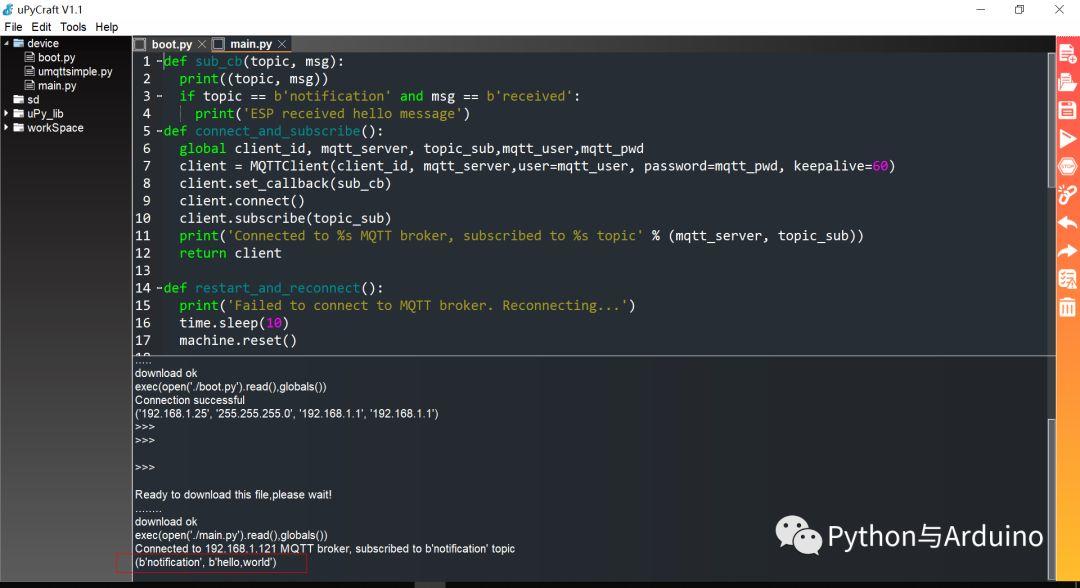
6.使用mosquitto_pub命令发布消息到notification,ESP32订阅该消息
