码丁实验室,一站式儿童编程学习产品,寻地方代理合作共赢,微信联系:leon121393608。
本文转载自古月居,原作者古月,原文链接:https://www.guyuehome.com/237。
简单的机器人仿真
- 修改版:2016-10-13 by ncnynl
前边我们已经介绍了ROS的基本情况,以及新手入门ROS的初级教程,现在就要真正的使用ROS进入机器人世界了。接下来我们涉及到的很多例程都是《ROS by Example》这本书的内容,我是和群里的几个人一起从国外的亚马逊上买到的,还是很有参考价值的,不过前提是你已经熟悉之前的新手教程了。
- 《ROS by Example》目前是第二版《ROS by Example v1 indigo》 可点击加入Q群:477659623,进入群文件下载。
- 本章部分内容来自《ROS by Example v1 indigo》,请按书中的说明安装例子。
一、ROS by Example

这本书是关于国外关于ROS出版的第一本书,主要针对Electric和Fuerte版本,使用机器人主要是TurtleBot。书中详细讲解了关于机器人的基本仿真、导航、路径规划、图像处理、语音识别等等,而且在google的svn上发布了所有代码,可以通过以下命令下载、编译:
svn checkout http://ros-by-example.googlecode.com/svn/trunk/rbx_vol_1

rosmake rbx_vol_1

rospack profile          //加入ROS package路径
注意:原来的内容已经无效,更改为针对indigo版本:
- 检查环境并安装依赖
$ cd ~
$ wget https://raw.githubusercontent.com/pirobot/rbx1/indigo-devel/rbx1-prereq.sh
$ sh rbx1-prereq.sh
- 安装书中例子
$ cd ~/catkin_ws/src/
$ git clone https://github.com/pirobot/rbx1.git
$ cd rbx1
$ git checkout indigo-devel
$ cd ~/catkin_ws
$ catkin_make
$ source ~/catkin_ws/devel/setup.bash
$ rospack profile
二、rviz简单机器人模拟
1、安装机器人模拟器
rviz是一个显示机器人实体的工具,本身不具有模拟的功能,需要安装一个模拟器arbotix。
svn checkout http://vanadium-ros-pkg.googlecode.com/svn/trunk/arbotix
rosmake arbotix
注意:原来内容已经无效,更改为indigo版本:
$sudo apt-get install ros-indigo-arbotix-*
$rospack profile
2、TurtleBot机器人的模拟
在书中的rbx_vol_1包里已经为我们写好了模拟的代码,我们先进行实验,完成后再仔细研究代码。
机器人模拟运行:
- 在新终端打开:
$ roscore
- 新终端打开:
$ roslaunch rbx1_bringup fake_pi_robot.launch
然后在终端中可以看到,机器人已经开始运行了,打开rviz界面,才能看到机器人实体。
rosrun rviz rviz -d `rospack find rbx1_nav`/sim.rviz
注意:适合indigo版本原来为sim_fuerte.vcg,更改为sim.rviz
后面的参数是加载了rviz的配置文件sim.rviz。效果如下:
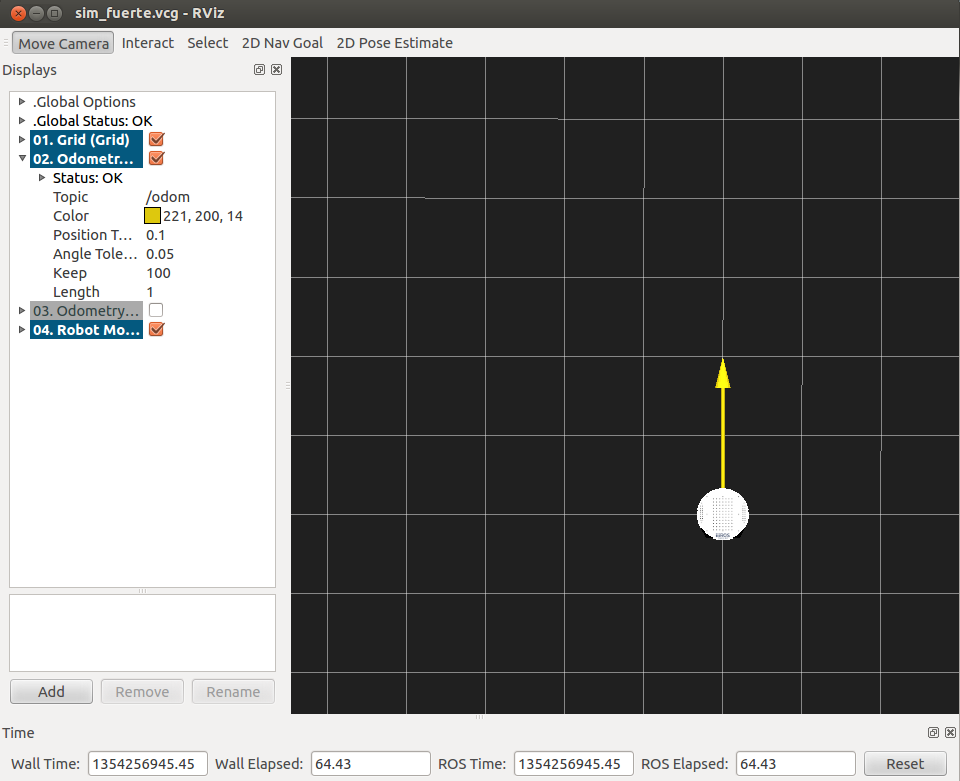
此时的机器人是静止的,需要发布一个消息才能让它动起来。
rostopic pub -r 10 /cmd_vel geometry_msgs/Twist '{linear: {x: 0.2, y: 0, z: 0}, angular: {x: 0, y: 0, z: 0.5}}'
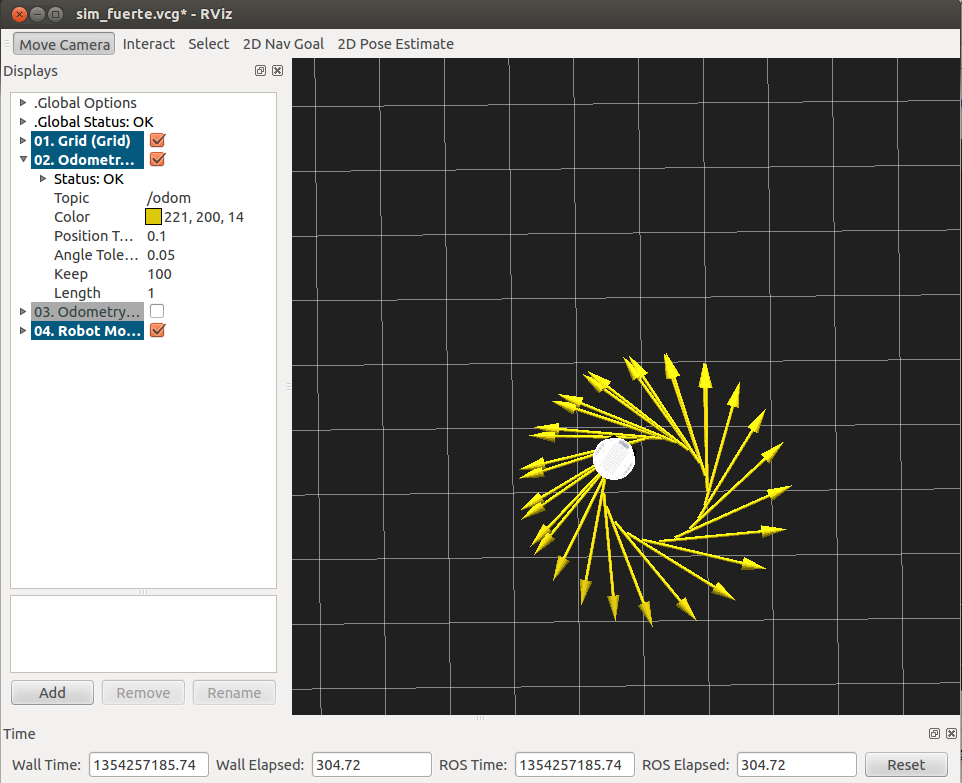
如果要让机器人停下来,需要在中断中按下“Ctrl+c”,然后输入:
rostopic pub -1 /cmd_vel geometry_msgs/Twist '{}'
也可以改变发送的topic信息,使机器人走出不同的轨迹。
三、实现分析
按照上面的仿真过程,我们详细分析每一步的代码实现。
1、TurtleBot机器人运行
机器人运行使用的是launch文件,首先打开fake_turtlebot.launch文件。
注意:请比较书中的indigo版本,此launch已经旧了
<launch>
  <param name="/use_sim_time" value="false" />
  <!-- Load the URDF/Xacro model of our robot -->
  <arg name="urdf_file" default="$(find xacro)/xacro.py '$(find turtlebot_description)/urdf/turtlebot.urdf.xacro'" />
  <param name="robot_description" command="$(arg urdf_file)" />
  <node name="arbotix" pkg="arbotix_Python" type="driver.py" output="screen">
      <rosparam file="$(find rbx1_bringup)/config/fake_turtlebot_arbotix.yaml" command="load" />
      <param name="sim" value="true"/>
  </node>
  <node name="robot_state_publisher" pkg="robot_state_publisher" type="state_publisher">
      <param name="publish_frequency" type="double" value="20.0" />
  </node>

  <!-- We need a static transforms for the wheels -->
  <node pkg="tf" type="static_transform_publisher" name="odom_left_wheel_broadcaster" args="0 0 0 0 0 0 /base_link /left_wheel_link 100" />

  <node pkg="tf" type="static_transform_publisher" name="odom_right_wheel_broadcaster" args="0 0 0 0 0 0 /base_link /right_wheel_link 100" />


</launch>
上面版本已经旧新的indigo版本为:
<launch>
  <param name="/use_sim_time" value="false" />

  <!-- Load the URDF/Xacro model of our robot -->
  <arg name="urdf_file" default="$(find xacro)/xacro.py '$(find rbx1_description)/urdf/turtlebot.urdf.xacro'" />

  <param name="robot_description" command="$(arg urdf_file)" />

  <node name="arbotix" pkg="arbotix_Python" type="arbotix_driver" output="screen" clear_params="true">
      <rosparam file="$(find rbx1_bringup)/config/fake_turtlebot_arbotix.yaml" command="load" />
      <param name="sim" value="true"/>
  </node>

  <node name="robot_state_publisher" pkg="robot_state_publisher" type="state_publisher">
      <param name="publish_frequency" type="double" value="20.0" />
  </node>

</launch>
文件可以大概分为四个部分:
(1) 从指定的包中加载urdf文件
(2) 启动arbotix模拟器
(3) 启动状态发布节点
(4) tf坐标系配置
2、rviz配置文件
在打开rviz的时候需要加载一个.vcg的配置文件,主要对rviz中的插件选项进行默认的配置。这里打开的是sim_fuerte.vcg文件,由于文件比较长,这里只列举重点的部分。
Background ColorB=0.12549

Background ColorG=0.12549

Background ColorR=0.12549

Camera Config=158.108 0.814789 0.619682 -1.57034

Camera Type=rviz::FixedOrientationOrthoViewController

Fixed Frame=/odom

Grid.Alpha=0.5

Grid.Cell Size=0.5

Grid.ColorB=0.941176

Grid.ColorG=0.941176

Grid.ColorR=0.941176

Grid.Enabled=1

Grid.Line Style=0

Grid.Line Width=0.03

Grid.Normal Cell Count=0

Grid.OffsetX=0

Grid.OffsetY=0

Grid.OffsetZ=0

Grid.Plane=0
注意:sim_fuerte.vcg为旧版本,新版本为sim.rviz, 打开路径为:rbx1_nav/sim.rviz
上面的代码是配置背景颜色和网格属性的,对应rviz中的选项如下图所示。
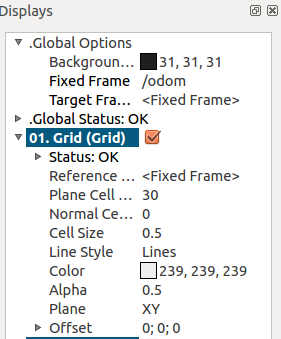
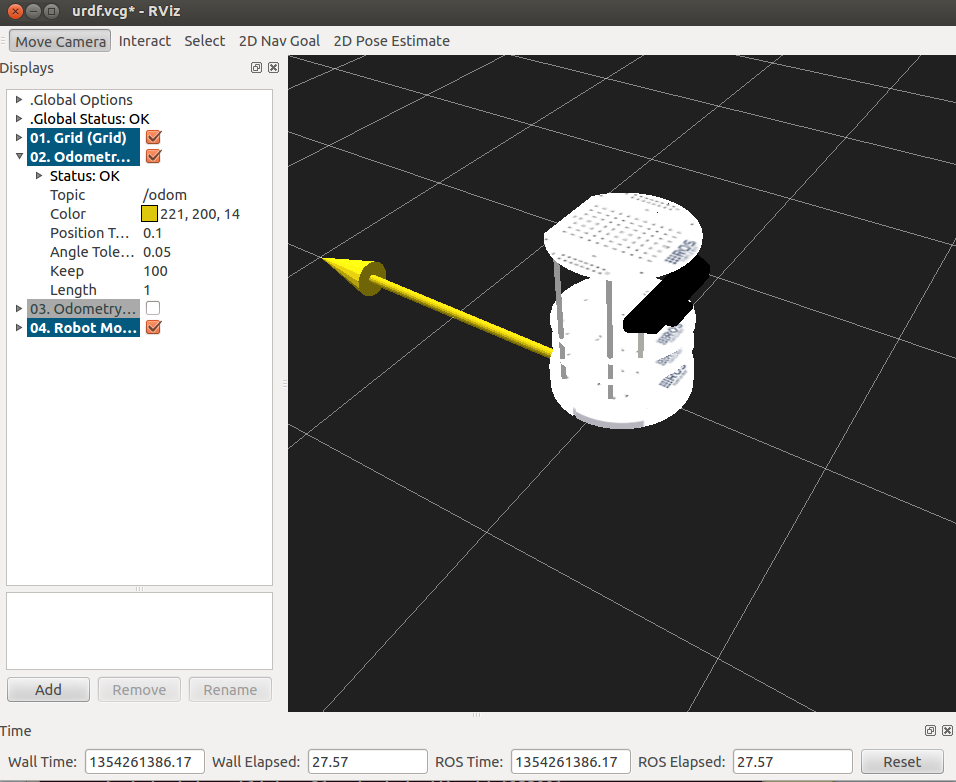
其中比较重要的一个选项是Camera的type,这个选项是控制开发者的观察角度的,书中用的是FixedOrientationOrthoViewController的方式,就是上面图中的俯视角度,无法看到机器人的三维全景,所以可以改为OrbitViewController方式,如下图所示:
3、发布topic
要让机器人动起来,还需要给他一些运动需要的信息,这些信息都是通过topic的方式发布的。
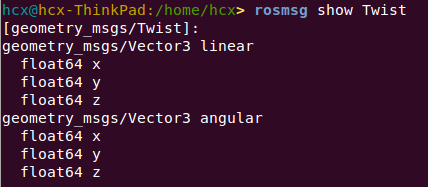
这里的topic就是速度命令,针对这个topic,我们需要发布速度的信息,在ROS中已经为我们写好了一些可用的数据结构,这里用的是Twist信息的数据结构。在终端中可以看到Twist的结构如下:
用下面的命令进行消息的发布,其中主要包括力的大小和方向。
[plain] view plain copy Background ColorB=0.12549

Background ColorG=0.12549

Background ColorR=0.12549

Camera Config=158.108 0.814789 0.619682 -1.57034

Camera Type=rviz::FixedOrientationOrthoViewController

Fixed Frame=/odom

Grid.Alpha=0.5

Grid.Cell Size=0.5

Grid.ColorB=0.941176

Grid.ColorG=0.941176

Grid.ColorR=0.941176

Grid.Enabled=1

Grid.Line Style=0

Grid.Line Width=0.03

Grid.Normal Cell Count=0

Grid.OffsetX=0

Grid.OffsetY=0

Grid.OffsetZ=0

Grid.Plane=0
4、节点关系图
