码丁实验室,一站式儿童编程学习产品,寻地方代理合作共赢,微信联系:leon121393608。
GSM Web Server
- 这个程序通过GSM shield和一个使能SIM卡的数据,来把Arduino或genuino板变为一个Web服务器。当开发板接收到来自连接好的客户端的请求时,它发送回模拟输入引脚0-5的数值。
- 并不是所有的网络运营商允许来自他们网络外部的传入数据请求。这意味着你可以用GSM shield创建一个Web服务器,但您可能无法从公共互联网连接到它;只能连接同一个运营商同一网络的另一个被允许的数据设备。您应该检查您的提供商,看看他们对传入的数据连接有什么具体的政策。
硬件要求
- Arduino 或者 Genuino 开发板
- Arduino + Telefonica GSM/GPRS Shield
- 启用数据的SIM卡
- (可选择) 6 电位计或者其他模拟输入连接到A0-A5
电路

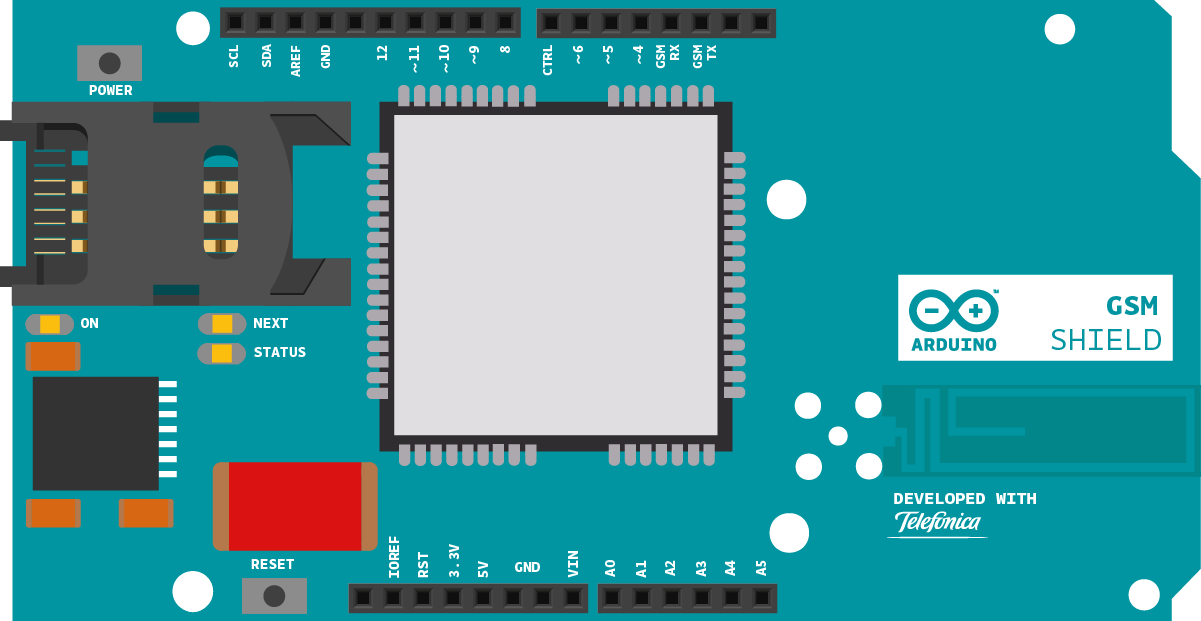
这是在一块Arduino或者Genuino开发板上的Arduino GSM Shield图
可选的模拟传感器(如光敏电阻、电位器等)连接到引脚A0-A5。
样例代码
- 首先,加上GSM库
#include <GSM.h>
- SIM卡可能有一个引脚数,来使能它们的功能。为您的SIM卡定义引脚。如果你的卡没有引脚,你可以让它空白:
#define PINNUMBER ""
- 定义几个常量来包含要连接的GPRS网络信息。你需要的接入点名称(APN)、登录和密码。要获得此信息,请与您的网络提供者联系,以获取最新的信息。此页有关于各种载波设置的一些信息,但它可能不是最新的。
#define GPRS_APN       "GPRS_APN"
#define GPRS_LOGIN     "login"
#define GPRS_PASSWORD  "password"
[Get Code]
- 初始化你要使用的类的实例。你需要GSM,GPRS,和GSMServer类。当你实例化 GSMServer的类时,你需要告诉它哪个端口等待传入的连接。80端口是HTTP请求的默认端口。
GPRS gprs;
GSM gsmAccess;
GSMServer server(80);
[Get Code]
- 在setup里,打开一个到计算机的串口连接。打开连接后,发送一个消息表示程序已经开始运行。
void setup(){
  Serial.begin(9600);
  Serial.println("Starting Arduino web client.");
[Get Code]
- 创建一个本地变量来跟踪连接状态。直到SIM连接到网络之前,你可以用这个来防止程序开始运行:
boolean notConnected = true;
[Get Code]
- 通过调用gsmAccess.begin()连接到网络。它以SIM卡的引脚当作一个参数。你也可以用gprs.attachGPRS()连接到GPRS网络。这个要求你前面声明的APN,登录和密码。通过放在while()循环里,你可以不断地检查连接的状态,等到他们都成为真。
- 当调制解调器连接到GPRS网络,gsmAccess() 将返回GSM_READY。以此为连接与否的标志。一旦连接好,setup()的其余部分将会运行。
while(notConnected)
  {
    if(gsmAccess.begin(PINNUMBER)==GSM_READY)
        (gprs.attachGPRS(GPRS_APN, GPRS_LOGIN, GPRS_PASSWORD)==GPRS_READY))
      notConnected = false;
    else
    {
      Serial.println("Not connected");
      delay(1000);
    }
  }
[Get Code]
- 用server.begin()开始服务器。你可以用grps.getIPAddress()请求服务器的IP地址,并结束setup。
server.begin();

  IPAddress LocalIP = gprs.getIPAddress();
  Serial.println("Server IP address=");
  Serial.println(LocalIP);
}
[Get Code]
- 在loop里,创建一个GSMClient实例,并检查是否有任何活动连接
void loop() {
  GSMClient client = server.available();

  if (client)
  {
[Get Code]
- 当客户端连接时,并且有数据等待被读取,开始读取请求。读取有效的字节,直到收到换行字符。
- 在这个例子里,你没有做对这个请求做任何事情,它认为这是一个HTTP请求,你就成为了一个网页。
while (client.connected())
    {
      if (client.available())
      {
        Serial.println("Receiving request!");
        bool sendResponse = false;
        while(char c=client.read()) {
          if (c == 'n') sendResponse = true;
        }
[Get Code]
- 一旦读取请求,就开始用client.print()和client.println()发送一个标准的HTTP响应头。
if (sendResponse)
       {
          client.println("HTTP/1.1 200 OK");
          client.println("Content-Type: text/html");
          client.println();
          client.println("<html>");
[Get Code]
- 读取模拟输入,并将其数值发送给客户端。
for (int analogChannel = 0; analogChannel < 6; analogChannel++) {
            client.print("analog input ");
            client.print(analogChannel);
            client.print(" is ");
            client.print(analogRead(analogChannel));
            client.println("<br />");
          }
[Get Code]
- 发送网页的关闭标签,并在关闭循环之前停止客户端连接。
client.println("</html>");
          //necessary delay
          delay(1000);
          client.stop();
        }
      }
    }
  }
}
[Get Code]
- 一旦你的代码被上传,打开串口监视器。一旦将IP地址打印到串口监视器上,就可以将其输入到Web浏览器中。你应该看到一个网页,这个网页介绍在每一个Arduino的六个输入引脚的模拟输入值。
- 如果您无法连接到IP地址,请确保您的网络运营商允许传入流量。
- 完整程序如下:
/*
 GSM Web Server

 A simple web server that shows the value of the analog input pins.
 using a GSM shield.

 Circuit:
 * GSM shield attached
 * Analog inputs attached to pins A0 through A5 (optional)

 created 8 Mar 2012
 by Tom Igoe
 */

// libraries
#include <GSM.h>

// PIN Number
#define PINNUMBER ""

// APN data
#define GPRS_APN       "GPRS_APN" // replace your GPRS APN
#define GPRS_LOGIN     "login"    // replace with your GPRS login
#define GPRS_PASSWORD  "password" // replace with your GPRS password


// initialize the library instance
GPRS gprs;
GSM gsmAccess;     // include a 'true' parameter for debug enabled
GSMServer server(80); // port 80 (http default)

// timeout
const unsigned long __TIMEOUT__ = 10 * 1000;

void setup() {
  // initialize serial communications and wait for port to open:
  Serial.begin(9600);
  while (!Serial) {
    ; // wait for serial port to connect. Needed for native USB port only
  }

  // connection state
  boolean notConnected = true;

  // Start GSM shield
  // If your SIM has PIN, pass it as a parameter of begin() in quotes
  while (notConnected) {
    if ((gsmAccess.begin(PINNUMBER) == GSM_READY) &
        (gprs.attachGPRS(GPRS_APN, GPRS_LOGIN, GPRS_PASSWORD) == GPRS_READY)) {
      notConnected = false;
    } else {
      Serial.println("Not connected");
      delay(1000);
    }
  }

  Serial.println("Connected to GPRS network");

  // start server
  server.begin();

  //Get IP.
  IPAddress LocalIP = gprs.getIPAddress();
  Serial.println("Server IP address=");
  Serial.println(LocalIP);
}

void loop() {


  // listen for incoming clients
  GSMClient client = server.available();


  if (client) {
    while (client.connected()) {
      if (client.available()) {
        Serial.println("Receiving request!");
        bool sendResponse = false;
        while (char c = client.read()) {
          if (c == 'n') {
            sendResponse = true;
          }
        }

        // if you've gotten to the end of the line (received a newline
        // character)
        if (sendResponse) {
          // send a standard http response header
          client.println("HTTP/1.1 200 OK");
          client.println("Content-Type: text/html");
          client.println();
          client.println("<html>");
          // output the value of each analog input pin
          for (int analogChannel = 0; analogChannel < 6; analogChannel++) {
            client.print("analog input ");
            client.print(analogChannel);
            client.print(" is ");
            client.print(analogRead(analogChannel));
            client.println("<br />");
          }
          client.println("</html>");
          //necessary delay
          delay(1000);
          client.stop();
        }
      }
    }
  }
}
[Get Code]
更多
- GPRS Constructor
- attachGPRS()
- GSMServer Constructor
- ready()
- beginWrite()
- write()
- endWrite()
- read()
- available()
- stop()
- Arduino GSM Shield – 完整的产品描述。
- Getting started with the GSM Shield – 在几分钟内启动所有东西
- GSM library – GSM 库的参考网页
- GSMExamplesMakeVoiceCall -如何用麦克风和扬声器进行语音通话。
- GSMExamplesReceiveVoiceCall – 接收并连接该呼叫,呼叫的号码显示在串口监视器上,然后挂断电话。
- GSMExamplesReceiveSMS – 如何收到一个SMS信息。
- GSMExamplesSendSMS – 如何通过串口监视器发送SMS输入号码和文本。
- GSMExamplesWebServer – 当从客户端获取一个请求时,Web服务器返回模拟输入引脚上的值。
- GSMToolsTestGPRS – 试图用提供的APN和证书来通过GPRS访问互联网 。

