码丁实验室,一站式儿童编程学习产品,寻地方代理合作共赢,微信联系:leon121393608。
GSM PIN Management(GSM引脚管理)
- 这个例子是提供给管理GSM shield的工具的一部分,可以帮助你改变或删除一个SIM卡的PIN。
硬件要求
- Arduino or Genuino Board
- Arduino + Telefonica GSM/GPRS Shield
- SIM card
电路

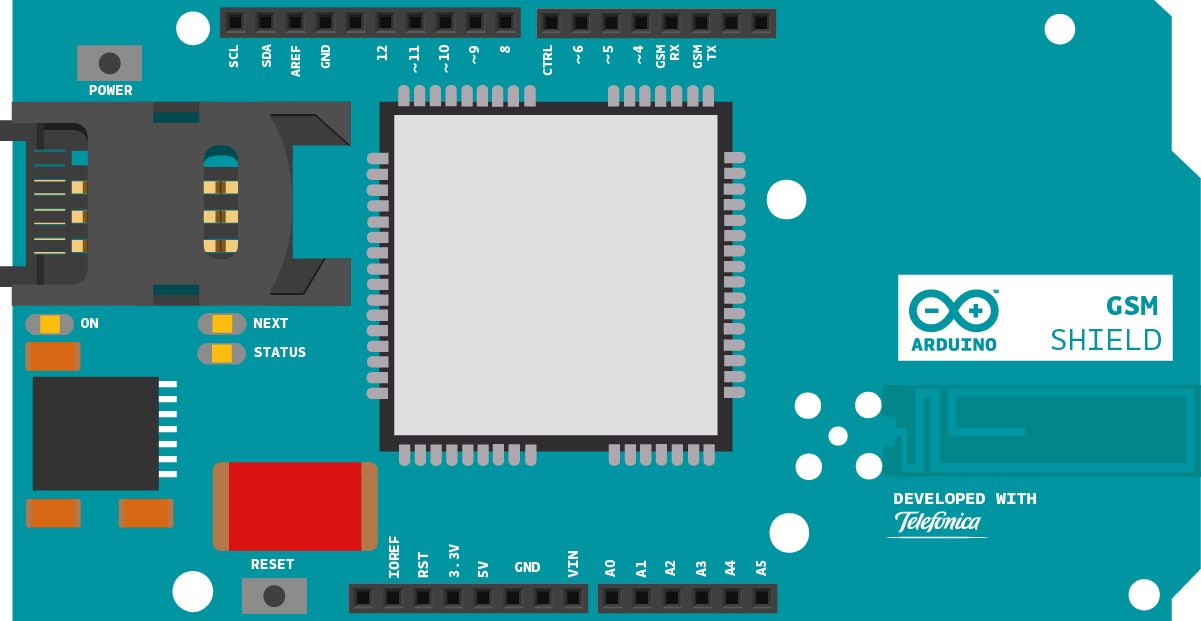
这是在一块Arduino或者Genuino开发板上的Arduino GSM Shield图
样例代码
- 首先,加上GSM库
#include <GSM.h>
- 实例化GSMPin类
GSMPIN PINManager;
- 创建您的变量,从一个字符串开始来保存串口监视器的输入。还可以制作了一个用于检查SIM引脚是否有效的标志,并发送信息到串口监视器的消息。
String user_input = "";

boolean auth = false;

String oktext = "OK";
String errortext = "ERROR";
[Get Code]
- 在setup里,打开一个到计算机的串口连接。打开连接后,向串口监视器发送一个消息示意该程序已启动。调用PINManager.begin()来重置调制解调器。
void setup(){
  Serial.begin(9600);
  Serial.println("Change PIN examplen");
  PINManager.begin();
[Get Code]
- 检查是否SIM卡被一个引脚锁住了。
while(!auth){
    int pin_query = PINManager.isPIN();
    if(pin_query == 1)
    {
[Get Code]
- 如果被锁定,通过串口监视器询问引脚。你可以使用一个自定义名为 readSerial() 的函数来解析这些信息。
Serial.print("Enter PIN code: ");
      user_input = readSerial();
[Get Code]
- 如果引脚有效,设置认证标志为true。向串口监视器发送状态消息,示意这个结果。如果你输入了错误的引脚,你可以再试一次。3次尝试失败后,引脚将被锁定,你将需要PUK号码解锁。
if(PINManager.checkPIN(user_input) == 0)
      {
        auth = true;
        PINManager.setPINUsed(true);
        Serial.println(oktext);
      }
      else
      {
        Serial.println("Incorrect PIN. Remember that you have 3 opportunities.");
      }
    }
[Get Code]
- 如果SIM卡处在PUK锁定模式,询问PUK代码和一个新的引脚。
else if(pin_query == -1)
    {
      Serial.println("PIN locked. Enter PUK code: ");
      String puk = readSerial();
      Serial.print("Now, enter a new PIN code: ");
      user_input = readSerial();
      if(PINManager.checkPUK(puk, user_input) == 0)
      {
        auth = true;
        PINManager.setPINUsed(true);
        Serial.println(oktext);
      }
      else
      {
        Serial.println("Incorrect PUK or invalid new PIN. Try again!.");
      }
    }
[Get Code]
- 如果出现错误,PIN号码和PUK同时被锁定,发送一个合适的状态信息:
else if(pin_query == -2)
    {
      Serial.println("PIN & PUK locked. Use PIN2/PUK2 in a mobile phone.");
      while(true);
    }
[Get Code]
- 如果没有PIN号码,设置认证标志为true
else
    {
      // SIM does not requires authetication
      Serial.println("No pin necessary.");
      auth = true;
    }
  }
[Get Code]
- 检查GSM网络登记,并注明是否你连接上,是否你在漫游。
Serial.print("Checking register in GSM network...");
  if(PINManager.checkReg() == 0)
    Serial.println(oktext);
  else if(PINManager.checkReg() == 1)
    Serial.println("ROAMING " + oktext);
  else
  {
    Serial.println(errortext);
    while(true);
  }
}
[Get Code]
- 您将创建一个自定义函数来处理来自串口监视器的串行输入。做一个字符串类型的命好名的函数。
String readSerial()
{
[Get Code]
- 当有可用的串行信息,把它读进一个新的字符串。如果遇到一个换行符,返回主程序。
String text = "";
  while(1)
  {
    while (Serial.available() > 0)
    {
      char inChar = Serial.read();
      if (inChar == 'n')
      {
        return text;
      }
      if(inChar!='r')
        text += inChar;
    }
  }
}
[Get Code]
- loop()作为PIN管理工具,允许你打开关闭PIN,或者改变它。
void loop()
{

  Serial.println("Choose an option:n1 - On/Off PIN.");
  if(PINManager.getPINUsed())
    Serial.println("2 - Change PIN.");
  String user_op = readSerial();
  if(user_op == "1")
  {
    Serial.println("Enter your PIN code:");
    user_input = readSerial();

    PINManager.switchPIN(user_input);
  }
  else if(user_op == "2" & PINManager.getPINUsed())
  {
    Serial.println("Enter your actual PIN code:");
    String oldPIN = readSerial();
    Serial.println("Now, enter your new PIN code:");
    String newPIN = readSerial();

    PINManager.changePIN(oldPIN, newPIN);
  }
  else
  {
    Serial.println("Incorrect option. Try again!.");
  }
  delay(1000);
}
[Get Code]
-
一旦你的代码被上传,打开串口监视器开始PIN的工作。
-
完整程序如下。
/*
 Band Management

 This sketch, for the Arduino GSM shield, checks the band
 currently configured in the modem and allows you to change
 it.

 Please check http://www.worldtimezone.com/gsm.html
 Usual configurations:
 Europe, Africa, Middle East: E-GSM(900)+DCS(1800)
 USA, Canada, South America: GSM(850)+PCS(1900)
 Mexico: PCS(1900)
 Brazil: GSM(850)+E-GSM(900)+DCS(1800)+PCS(1900)


 Circuit:
 * GSM shield

 created 12 June 2012
 by Javier Zorzano, Scott Fitzgerald

 This example is in the public domain.
 */

// libraries
#include <GSM.h>

// initialize the library instance
GSMBand band;

void setup() {
  // initialize serial communications and wait for port to open:
  Serial.begin(9600);
  while (!Serial) {
    ; // wait for serial port to connect. Needed for Leonardo only
  }

  // Beginning the band manager restarts the modem
  Serial.println("Restarting modem...");
  band.begin();
  Serial.println("Modem restarted.");

};


void loop() {
  // Get current band
  String bandName = band.getBand(); // Get and print band name
  Serial.print("Current band:");
  Serial.println(bandName);
  Serial.println("Want to change the band you’re on?");
  String newBandName;
  newBandName = askUser();
  // Tell the user what we are about to do…
  Serial.print("nConfiguring band ");
  Serial.println(newBandName);
  // Change the band
  boolean operationSuccess;
  operationSuccess = band.setBand(newBandName);
  // Tell the user if the operation was OK
  if (operationSuccess) {
    Serial.println("Success");
  } else {
    Serial.println("Error while changing band");
  }

  if (operationSuccess) {
    while (true);
  }
}

// This function offers the user different options
// through the Serial interface
// The user selects one
String askUser() {
  String newBand;
  Serial.println("Select band:");
  // Print the different options
  Serial.println("1 : E-GSM(900)");
  Serial.println("2 : DCS(1800)");
  Serial.println("3 : PCS(1900)");
  Serial.println("4 : E-GSM(900)+DCS(1800) ex: Europe");
  Serial.println("5 : GSM(850)+PCS(1900) Ex: USA, South Am.");
  Serial.println("6 : GSM(850)+E-GSM(900)+DCS(1800)+PCS(1900)");

  // Empty the incoming buffer
  while (Serial.available()) {
    Serial.read();
  }

  // Wait for an answer, just look at the first character
  while (!Serial.available());
  char c = Serial.read();
  if (c == '1') {
    newBand = GSM_MODE_EGSM;
  } else if (c == '2') {
    newBand = GSM_MODE_DCS;
  } else if (c == '3') {
    newBand = GSM_MODE_PCS;
  } else if (c == '4') {
    newBand = GSM_MODE_EGSM_DCS;
  } else if (c == '5') {
    newBand = GSM_MODE_GSM850_PCS;
  } else if (c == '6') {
    newBand = GSM_MODE_GSM850_EGSM_DCS_PCS;
  } else {
    newBand = "GSM_MODE_UNDEFINED";
  }
  return newBand;
}
[Get Code]
更多
-
Arduino GSM Shield – 完整的产品描述。
-
Getting started with the GSM Shield – 在几分钟内启动所有东西
-
GSM library – GSM 库的参考网页
-
GSMPIN
-
begin()
-
isPIN()
-
checkPIN()
-
checkPUK()
-
changePIN()
-
switchPIN()
-
checkReg()
-
getPINUsed()
-
setPINUsed()
-
GSMToolsTestGPRS – 试图用提供的APN和证书来通过GPRS访问互联网 。
-
GSMToolsGsmScanNetworks – 扫描可用网络和打印关于IMEI和SIM卡号码的信息。
-
GSMToolsPinManagement – 如何更改或删除引脚数。
-
GSMToolsTestModem – 测试看看GSM shield的调制解调器是否正确工作。
-
GSMToolsTestWebServer – 一个简单的Web服务器,没有任何答复,只打印客户端的请求和服务器IP地址。
-
GSMExamplesMakeVoiceCall – 如何用麦克风和扬声器进行语音通话。

